3. Getting to know the R interface - objects
In this course, we will be using R commands and/or scripts. It’s possible to use the built-in text editor with Windows (NotePad) or MAcOS (TextEdit) to record/store your commands as a script, although I prefer a dedicated text editor, which has additional functionality eg. very powerful find and replace features, and automatic highlighting of R commands in colours, and includes line numbers – it’s useful to easily find bits of the script later on by line number. I recommend “NotePad++”, but that's just what I prefer (it’s free!). Don't use a word processor – these often include “hidden” symbols which can interfere with R.
Other things worth noting is that R ignores extra spaces in commands, and is very much case sensitive. The variable “Age” is different to the variable “age”. R also ignores anything on a line that follows a # symbol. This is very handy, as it is possible (and highly recommended from a reproducible research perspective!) to add comments to your scripts using the # symbol. In complex scripts it's a great idea to make many comments explaining what you are doing. Then you don't have to try to remember weeks (or years!) later, and it’s much easier for others to understand what you did! It’s also important to note that R ignores spaces, so its okay to use lots of spaces to make your scripts look nice. Don't use tabs though: it’s considered poor form in writing code, and tabs can often be recorded as special characters in some text editors.
When you open R the main window will be the “console”, and it will have a “>” symbol where you start typing. To make R perform the command you gave it, you simply press the “Enter” key (often called the “Return” key) on your keyboard, at times I’ll show this with <Enter>, which means press the Enter button. For example: Open R
The prompt “>” indicate that R is ready to receive a command. Type 2 + 2 into the console, and press enter to submit the command and receive the result.

[1] indicates the first entry in the first line of the output line. This is handy for multiple line answer – but more on that later. Typing “<-” (a back arrow and a hyphen with no spaces) tells R to assign something or perform a command on an object. Assignment works from right to left. Enter these two commands:
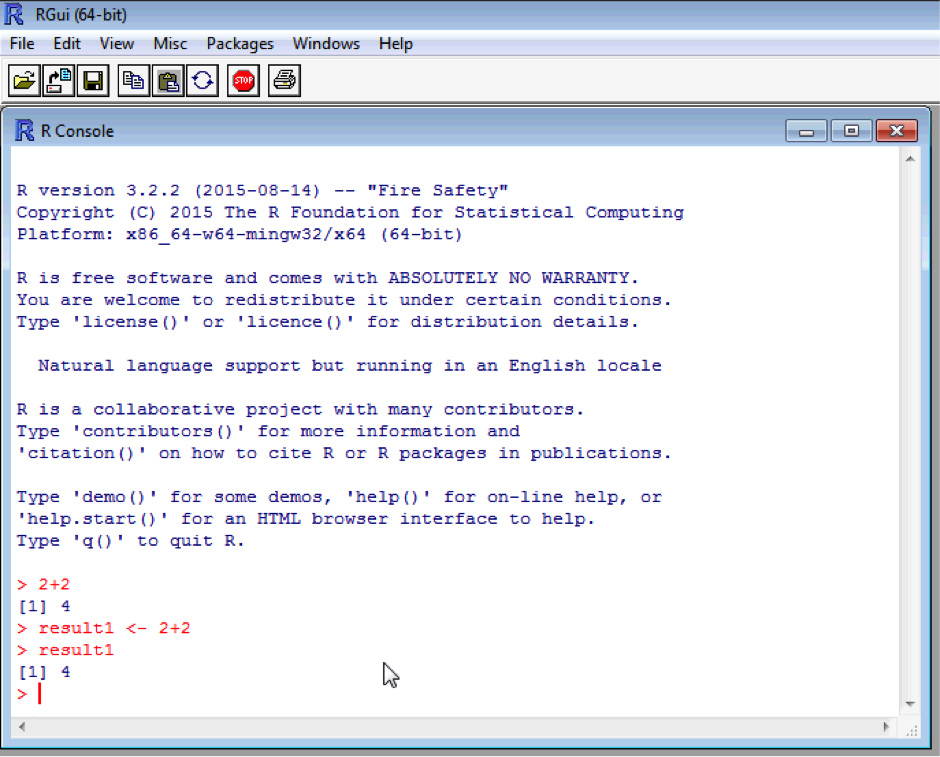
The sum of 2 and 2 has now been assigned to an object called “result1”. Typing result1 will show the contents of the object. Naturally this is a single number, 4. Again, note that R is case sensitive and so result1, Result1 and RESULT1 will all be different objects. Try typing in “Result1” and see what happens!
Ultimately you will end up with many objects in your “workspace” (ie. R’s memory). Create a second object called result2 and make it equal 4 + 4. You can list the objects in your workspace using the in built “ls()” function.
Functions are called by name followed by brackets which contain the arguments (modifiers) to the function. “ls” is called without arguments because we simply want a list of all objects in the workspace , so the brackets are empty.
Objects can be overwritten! This is important because it allows you to update or modify an object. However, it can lead to problems if done by accident, so be careful naming objects! Say we want to add 10 to result1:
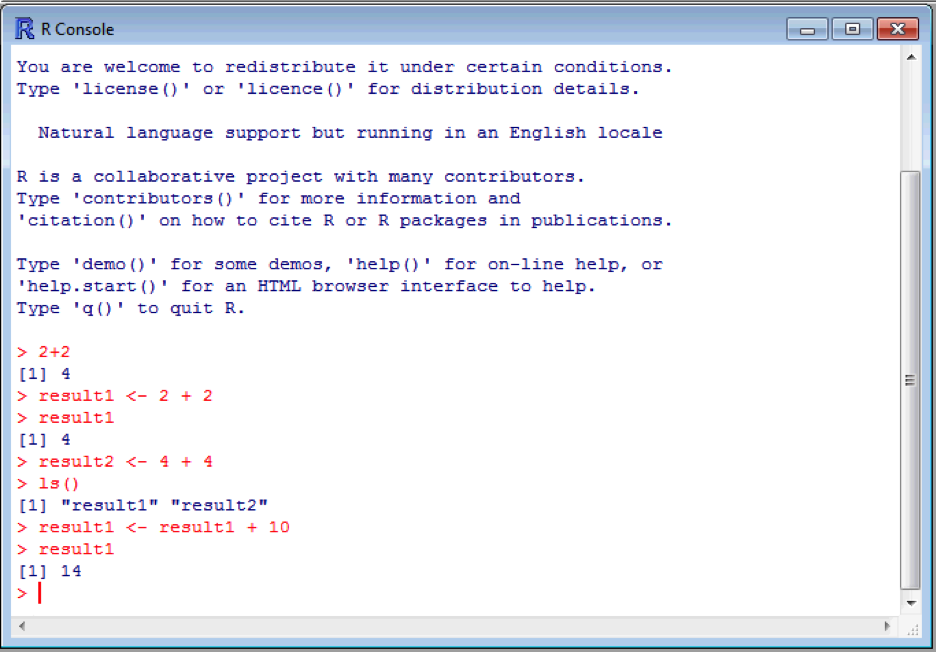
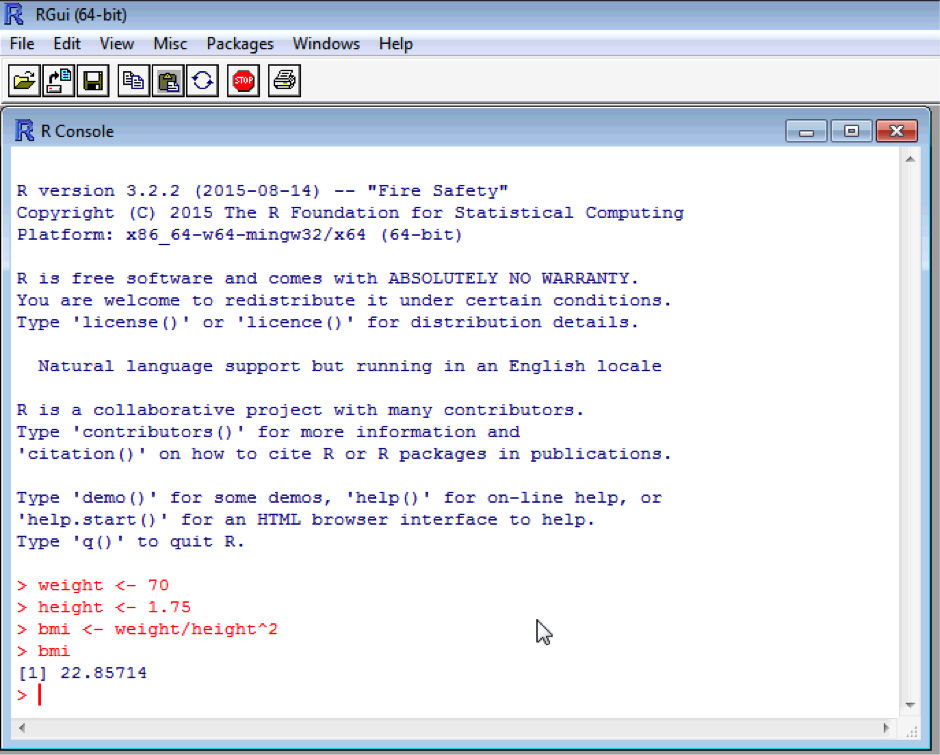
Now result1 is equal to the value 14! Quite often it’s safer to create a new object calculated form existing objects which we want to keep. For example, say we want to calculate a body mass index. We need a weight and a height, and BMI is calculated as weight/height2. Create two new objects called weight (70) and height (1.75), and one called bmi which is calculated as above (we will assume the weight is in kg and height is in metres). You’ve probably by now noticed that R will pop up suggestions for things as you type – quite handy if you forget the exact name or spelling. Don't forget to type bmi into the console to get the value of bmi!
weight <- 70
height <- 1.75
bmi <- weight/height^2
bmi