The First Steps, coding in Tinkercad Circuits
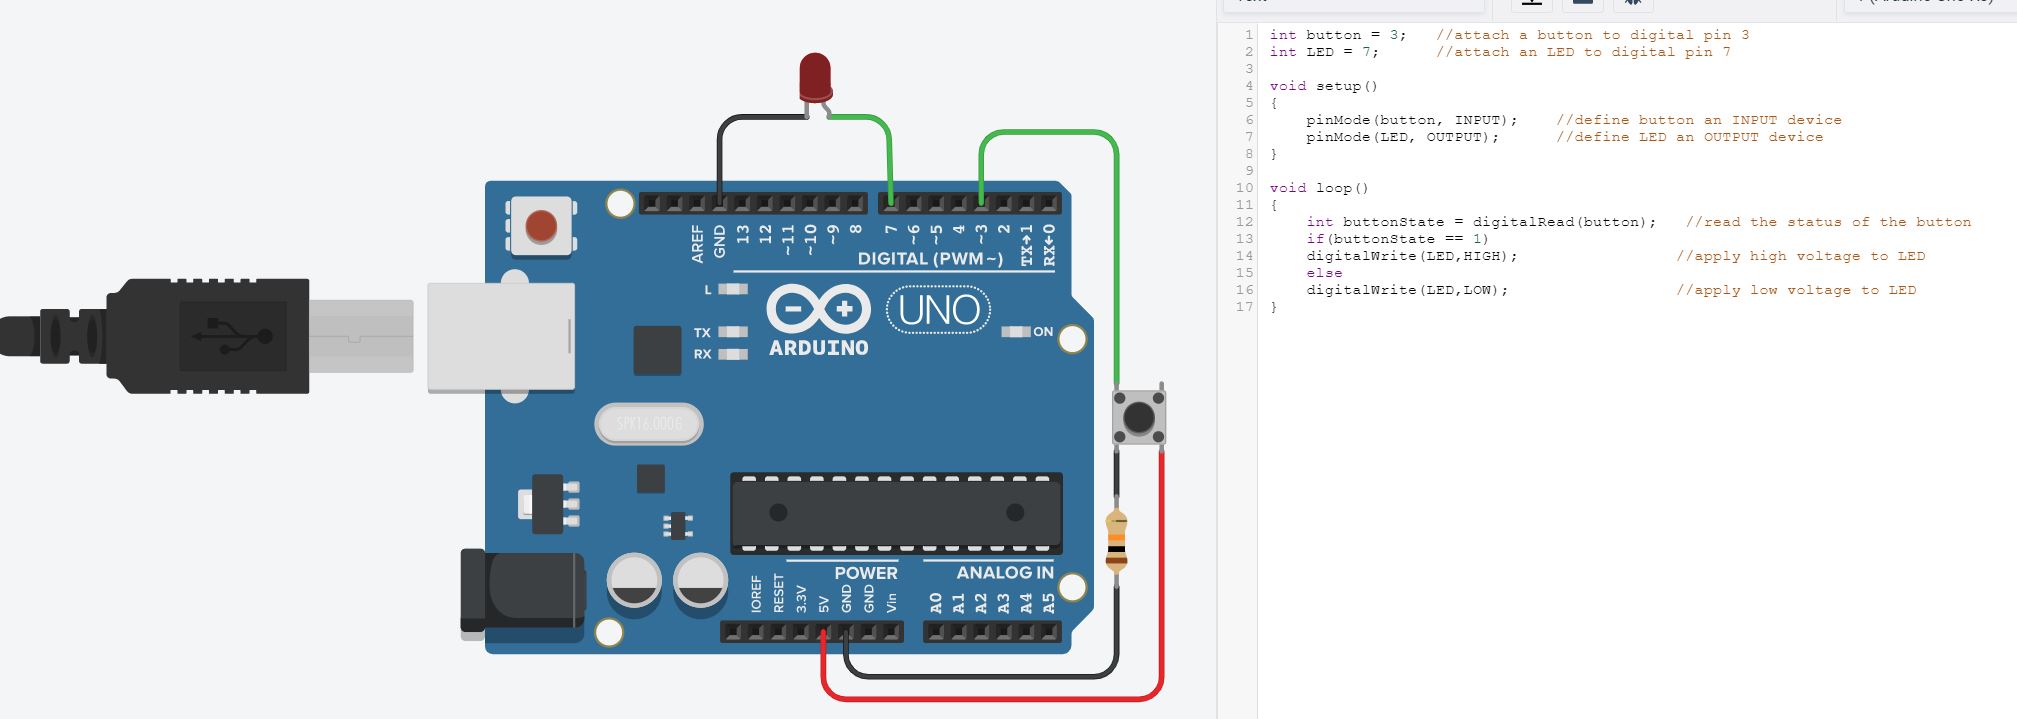
Using the Tinkercad Circuits platform you will need to create a circuit that looks like the one in the picture below.
Make sure the LED is connected to Pin 7 and Ground and the Push Button is attached to Pin 3 and Ground in the same way as the diagram
Copy the code below into the text section.
_________________________________________________________________________
int button = 3; //attach a button to digital pin 3
int LED = 7; //attach an LED to digital pin 7
void setup()
{
pinMode(button, INPUT); //define button an INPUT device
pinMode(LED, OUTPUT); //define LED an OUTPUT device
}
void loop()
{
int buttonState = digitalRead(button); //read the status of the button
if(buttonState == 1)
digitalWrite(LED,HIGH); //apply high voltage to LED
else
digitalWrite(LED,LOW); //apply low voltage to LED
}
_________________________________________________________________________
Note- You can write the code leaving off any comments after "//" and it will still run. These comments are for clarification and not used to run the code. This can save you time when setting up your circuit.
Once you have finished, your screen should look like this
Now run the simulation. Did you get it to work?
What the code means.
Lines 1-2
Think of these lines (anything before the "void setup()" on line 4 above) as a bit of a dictionary. This is where variables are defined. In the above examples, 2 variables, both of int type (integers - that is, whole numbers) were defined. One was called "LED" and one was called "button". The variable "button" was assigned the value 3 (which will later be linked to pin 3 on the hardware), while the variable "LED" was assigned the value of 7.
Lines 4-8
This is the void setup() section. The lines of code between the open and closed braces (aka curly brackets) is run only once. Think of this section as getting everything setup in a kitchen when baking a cake - you only need to preheat the oven once, you only get the milk out of the fridge once, and you only open the recipe book once.
The pinMode part of lines 6 and 7 tells Arduino that the information contained within the sets of parentheses (aka round brackets) refers to pins on the Arduino board. The phrase pinMode(LED,OUTPUT) says to Arduino, that the variable, with the value of 7, refers to Pin 7, and is an OUTPUT type of pin. This means that Arduino will send a signal out of this pin, rather than waiting for a stimulus to come into the pin.
Lines 10-17
This is the void loop() section. The lines of code between the open and closed braces repeat, in order from the top to the bottom, until there is code specifying it to stop, or until there is no power provided to keep running.
Line 12 defines a new variable, called "buttonState", and is of integer type. The value of this variable is assigned each time the loop repeats, and it is the value associated with the state of the "button" pin. That is, the line looks at Pin 3, the "button" pin, and reads the state. If it is not pressed, it has a value of 0, and if it is pressed, it has a value of 1.
The next part of code is an "if" loop. If the condition within the parentheses is true, the code following is executed. If not, Arduino passes over the code following and enters the "else" section.
In this case, if the value of the variable "buttonState" is equal to 1 (the symbols == means equals, whereas in Arduino, using the equals symbol (=) assigns a value to a variable), the condition is true and the code following runs. That code "writes" (or sends) a signal to the variable LED (which has a value of 7, and because LED is an OUTPUT in pinMode, it means Pin 7) of HIGH. HIGH simply means maximum voltage for the pin (i.e. 3.5 or 5V in most cases). LOW means minimum voltage for the pin (i.e. 0v).
If the condition was true, Arduino passes over the else statement and reaches the closed brace. This is the signal to loop once again, and start the buttonState checks again.
If there is more than 1 line of code needed within an If (or If...else) statement, braces can be used to contain multiple lines of code which relate to the "If" and "else" segments of code. "else" is not always required, if the "else" is simply a "do nothing" function. If the code required a green or red LED to be turned on for a given condition, the else would be required (it would specify which LED to turn on).
"If" statements can be combined with else statements, to create an "else if (xxx)" condition - this can be useful for specifying 3 or more outcomes based on a set of inputs (e.g. using a rotary angle sensor, and wanting different outputs after reading values of 0-10, 11-20, 21-30, etc.)