Correct an Organisation's Location(s)
Process Overview
Only Placement Administrators have access to correct an Organisation’s Location records. If you are not a Placement Administrator, send an email request to your Placement Administrator.
Location records should only be corrected if incorrect information has been entered or selected for the Location.
If the Location record needs to be updated due to a recent or future change, insert a new effective dated row to update the Location record as at the date of the change (refer to the ‘Updating an Organisation’s Location’ process page).
Step by Step Instructions
Step 1: Receive request to correct an Organisation’s Location(s)
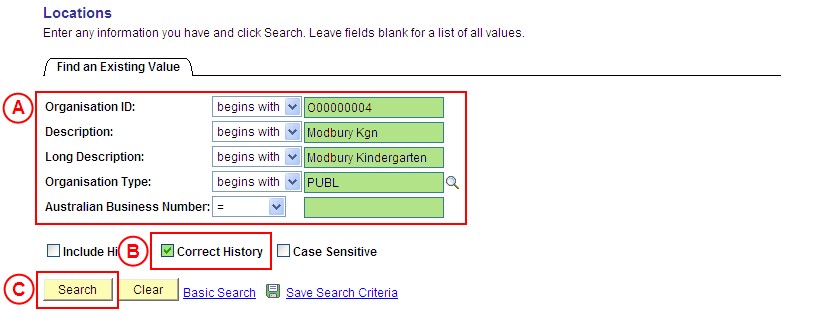
Step 2: Locate the Organisation’s Locations in ‘Correction’ mode
Question 1: Does a Location Region, Description or Comment need to be corrected?
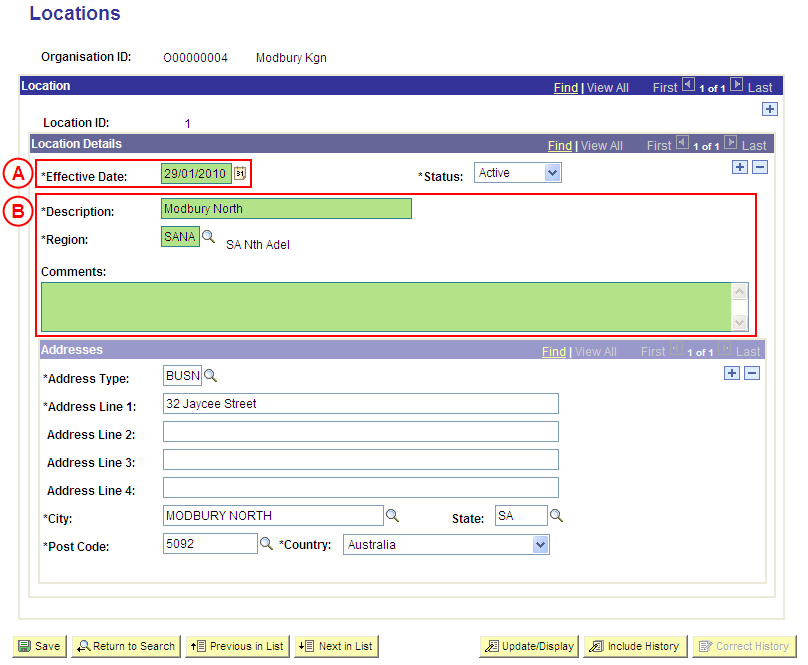
Step 3: Correct the Comment, Region and/or Description
Question 2: Does an Address need to be deleted from a Location?
Step 4: Delete the Address(es) from the Location
Question 3: Does an Address need to be added to a Location?
Step 5: Add the Address(es) to the Location
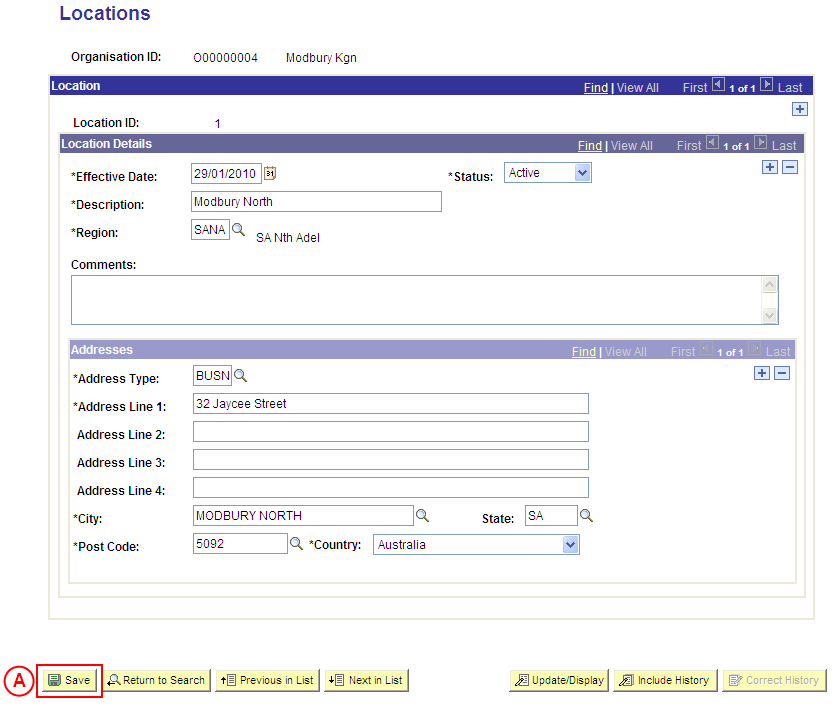
Step 6: Save the corrections to the Organisation’s Locations
Step 7: Send notification that the Location record has been corrected
|
Question 1: Does a Location Region, Comment or Description need to be corrected? |
||
|
Question |
Yes |
No |
|
Does a Location Region, Comment or Description need to be corrected? |
Go to step 3. |
Go to question 2. |
|
Explanation: If the Region, Comment and/or Description of a Location need to be corrected, correct these details (step 3). If the Region, Comment or Description of a Location does not need to be updated, the process continues by determining if a Location needs to be deleted from the Organisation (question 2). |
||
|
Question 2: Does an Address need to be deleted from a Location? |
||
|
Question |
Yes |
No |
|
Does an Address need to be deleted from a Location? |
Go to step 4. |
Go to question 3. |
|
Explanation: If an Address needs to be deleted from a Location, delete the Address(es) (step 4). If an Address does not need to be deleted, the process continues by determining if an Address needs to be added to a Location (question 3). |
||
|
Application: Medici Navigation: The Locations page will already be displayed as a result of performing step 2 |
|
|
|
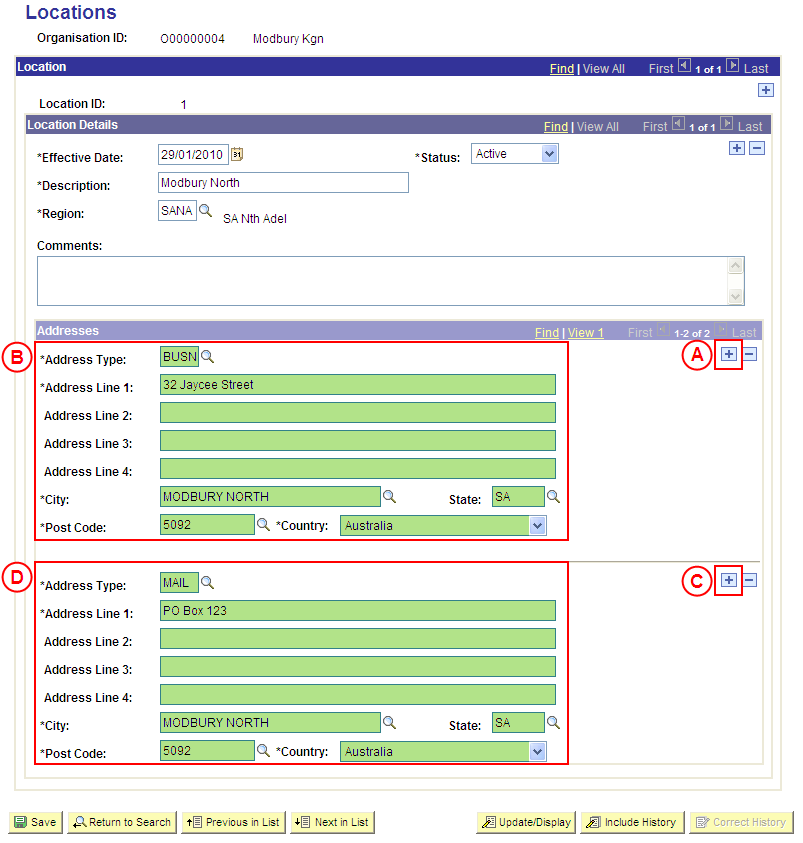
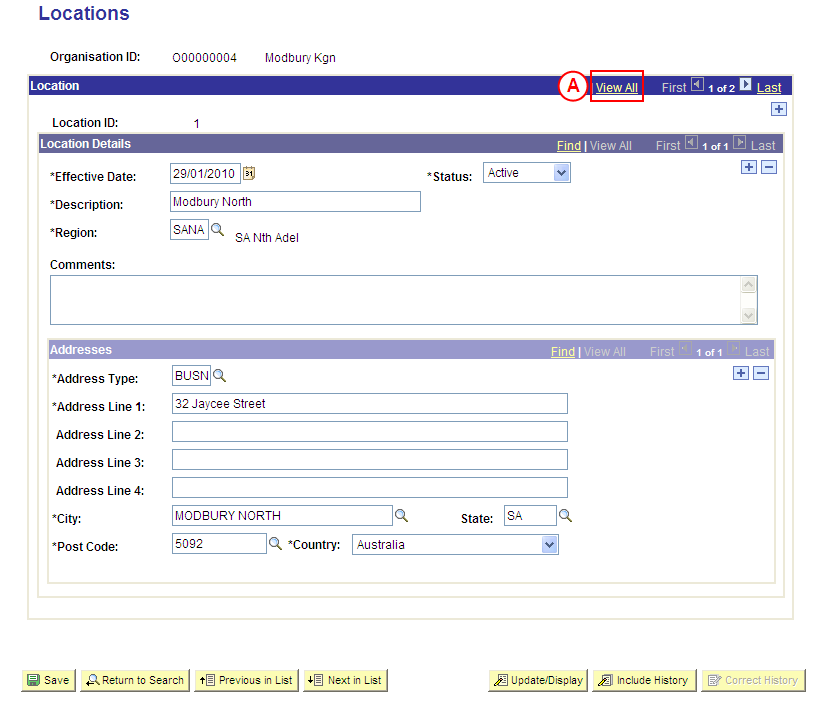
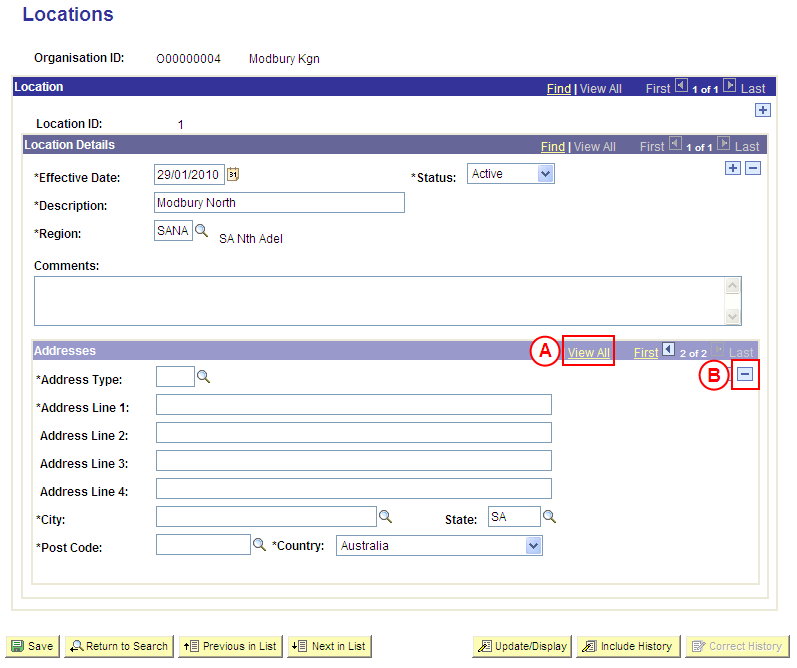
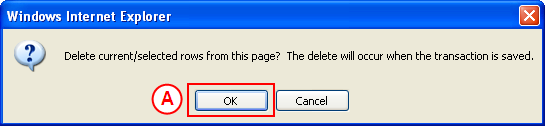
Addresses If there is more than one Address for the Location:In the Addresses section of the relevant Location record, select the View All link to display all Addresses attached to the Location record. In the Addresses section, select the Delete Row button ( ) adjacent to the Address record to be deleted.Result: A message is displayed requesting confirmation the selected row is to be deleted, and advises the deletion will occur when the transaction is saved. |
|
|
|
Select the OK button (or press Enter).
Result: The selected Address is deleted. |
|
Continue to repeat this step until all Addresses that are no longer required have been deleted. |
|
Question |
Yes |
No |
|
Does an Address need to be added to a Location? |
Go to step 5. |
Go to step 6. |
|
Explanation: If an Address needs to be added to a Location, add the relevant Address record(s) before saving the corrections to the Organisation’s Locations (step 5). If an Address does not need to be added, the corrections to the Organisation’s Locations can be saved (step 6). |
||
|
Application: Medici Navigation: The Locations page will already be displayed as a result of performing step 2 |
|
|
|
Addresses If there is an existing Address record:In the Addresses section of the relevant Location record, select the Add a New Row button ( ). There is no need to insert a new row if there are no existing Address records for the Location. Address Type: Select the appropriate value as follows:- BUSN (Business) if the address being entered is a business address. - MAIL if the address being entered is a mailing address. Address Line 1: Type the [first line of the address]. Address Line 2: Type the [second line of the address] (if applicable). Address Line 3: Type the [third line of the address] (if applicable). Address Line 4: Type the [fourth line of the address] (if applicable). City: Type or select the [city, suburb or town name]. State: Type or select the [relevant state or territory]. Post Code: Type or select the [relevant post code]. Country: Type or select the [relevant country]. If further Addresses need to be recorded for the Location:In the Addresses section, select the Add a New Row button ( ). Update the new row in the Addresses section as follows:Address Type: Select the appropriate value as follows: - BUSN (Business) if the address being entered is a business address. - MAIL if the address being entered is a mailing address. Address Line 1: Type the [first line of the address]. Address Line 2: Type the [second line of the address] (if applicable). Address Line 3: Type the [third line of the address] (if applicable). Address Line 4: Type the [fourth line of the address] (if applicable). City: Type or select the [city, suburb or town name]. State: Type or select the [relevant state or territory]. Post Code: Type or select the [relevant post code]. Country: Type or select the [relevant country]. |
|
Continue to repeat parts C and D of this step until all required Addresses have been added to the Location. |
|
Continue to repeat this step until all required Addresses have been added to all relevant Locations. |